Workflow
Applies to:
KeepStock
Inventory Scan
Accessing Workflow to View an Order
There are two ways users are notified of orders that require approval or authorization to submit.
- Through the Email Notification that is automatically generated when an order is created or approved in Grainger Inventory Solutions application
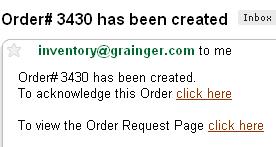
- Open the email
- Click the order link in the email
- If not currently logged on, user will be taken to the Grainger Inventory Solutions log on
- Log on to Grainger Inventory Solutions
- User will be taken to the order that requires approval or authorization to submit.
- Through the personalized To Do List. After logging on to Grainger Inventory Solutions, user will see orders requiring approval or authorization to submit.

NOTE: Order(s) displayed in bold have not been previously viewed.
- The To Do List displays the Program name / Order number / Workflow step required / (no. of items on order)
- Click on the order that you want to schedule or acknowledge
- User will be taken to the workflow screen displaying the order that requires approval or authorization to submit.
Workflow Activities
Go to the following steps to perform any activities required to approve (Schedule) or submit (acknowledge) the order to Grainger.
- Step 1 – Edit Order Header Information
- Step 2 – View Item information from Workflow
- Step 3 – Workflow Item Messages
- Step 4 – Edit Item Quantities in Workflow
- Step 5 – Deleting lines from an Order
- Step 6 – Print or print preview from Workflow
- Step 7 – Approving or Submitting an Order
Step 1 – Edit Order Header Information
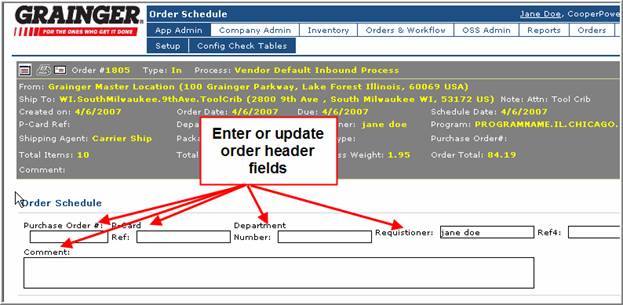
- Key in, or overtype information in the Purchase Order #, P-Card Ref, Department Number, Requisitioner, and/or Comments fields.
NOTE: The P-Card Ref field should only be populated with reference codes supplied by the OSS team. Entering other information, such as credit card numbers, will cause the order to reject.
- The information you enter will be saved when you approve or submit the order.
Step 2 – View Item Information from Workflow
There are three options to view additional item information from Workflow
- Hover your cursor over the Part # to view:
- Part# id (Barcode label id)
- Price
- Minimum inventory quantity
- Maximum inventory quantity
- Multiple (Part# must be ordered in multiples of this quantity)
- Fixed Location
- Double click on the Part# to view:
- Part# id (Barcode label id)
- Price
- Minimum inventory quantity
- Maximum inventory quantity
- Multiple (Part# must be ordered in multiples of this quantity)
- Fixed Location
- Click on the item description link to view additional information and link to item information on Grainger.com
To view:

Step 3 – Workflow Item Messages
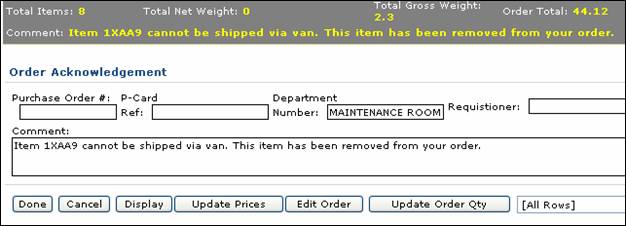
Item messages will appear in the Notification email. When you open an order in workflow, you will see any item related messages similar to these:
Item not meeting the min order qty or item more than the max inventory qty:

Item not van eligible and has been removed from current order:
How to interpret and act on the Item Messages:
| Item Message | Comments |
|---|---|
| The order quantity for item XXXXX exceeds the Max Inventory Quantity. (the maximum inventory qty established by the customer) | No automatic change is made to the quantity. You can manually change the quantity |
| The order quantity for item XXXXX has been adjusted to meet the Minimum Order Quantity. (The minimum order qty established by Grainger) | The quantity has been automatically changed to meet the Min Order Quantity. You can manually increase the quantity, but not decrease it below the minimum order quantity. |
| The order quantity for item XXXXX has been adjusted to meet the Order Multiple Quantity (The order multiple quantity established by Grainger) | The quantity has been automatically changed to meet Order Multiple quantity requirements. You can manually change the quantity to any quantity that meets the Multiple Order Quantity requirements |
| Item XXXXX has been discontinued and cannot be ordered. This item has been removed from your order | The item has been automatically removed from the order. No manual changes are allowed. |
| Item XXXXX is available while supplies last. A Grainger resource will contact you with a future alternate. | No automatic change is made to the item/quantity. You can manually change the quantity. |
| Item XXXXX cannot be shipped via van. This item has been removed from your order. | This message applies to van locations only. The item has been automatically removed from the order. No manual changes are allowed. |
| Item XXXXX is not available for purchase. This item has been removed from your order. | The item has been coded Inactive for your Program (Stocking Location.) The item has been automatically removed from the order. No manual changes are allowed. |
Step 4 – Edit Item Quantities in Workflow
From the Workflow screen, place your cursor in the Qty to schedule field and change the quantity.

Click on the ![]() button to save your updates.
button to save your updates.
Step 5 – Deleteting Lines from an Order
Click on the ![]() button
button
Click on the line you want to change

Overtype the Step Qty with zero (0).

Click ![]()
Click on ![]() to the right of the line
to the right of the line

Click OK in the pop-up box to confirm you want to delete line
Click on the Grainger logo to return to your home page
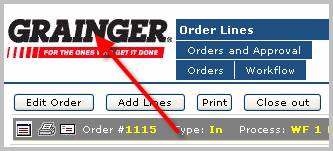
To perform other workflow steps in the order, including scheduling or acknowledgement, select the order from your To Do List to return to Workflow for the order.
Step 6 – Print or Print Preview from Workflow
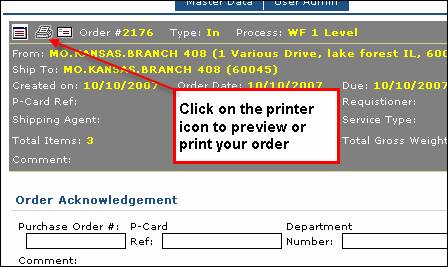
Click on the Printer icon in workflow
Use the Print button to print a copy if required, when finished click the Close Window button to return to Workflow.
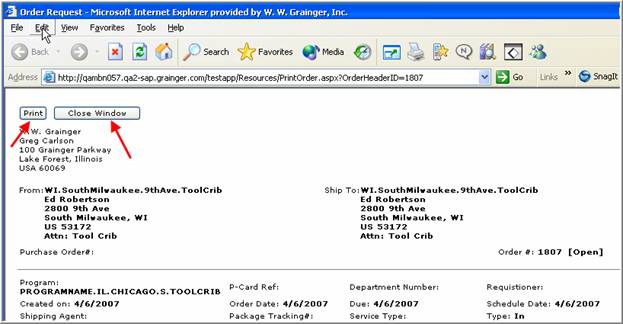
NOTE: After user has made changes and clicked on the ![]() , the print preview will reflect updated quantity, price and extended price.
, the print preview will reflect updated quantity, price and extended price.
Step 7 – Approving or Submitting the Order
To Approve or Submit the order click ![]()
In the popup click OK to approve or submit the order. To back out of the order without approving or saving any changes, click ![]()
NOTE: If this is the final order approval step, the order will be submitted to Grainger. If another level of approval is needed an email notification will be sent to the next level approver.

